INSTRUCTIONS FOR INSTALLING
BATHTUB SADDLE
INCLUDED WITH BATHTUB SADDLE
Saddle
Template
WHAT YOU WILL NEED
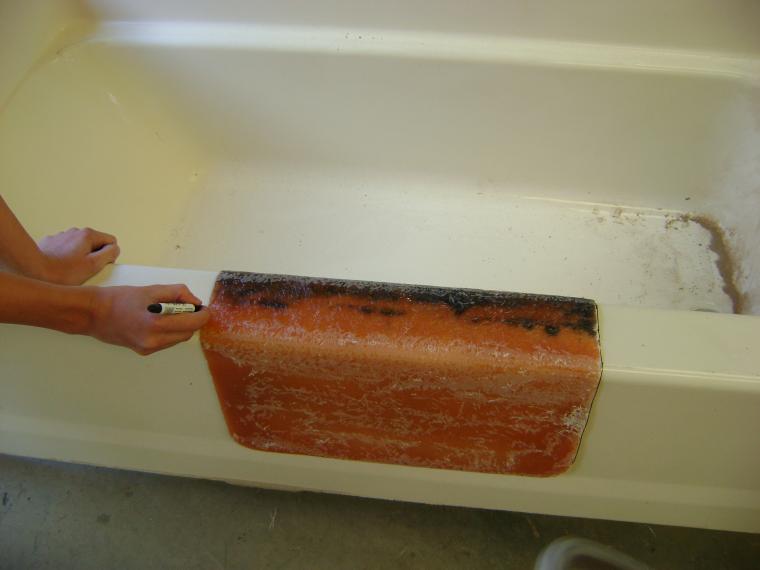
Black Felt Marker
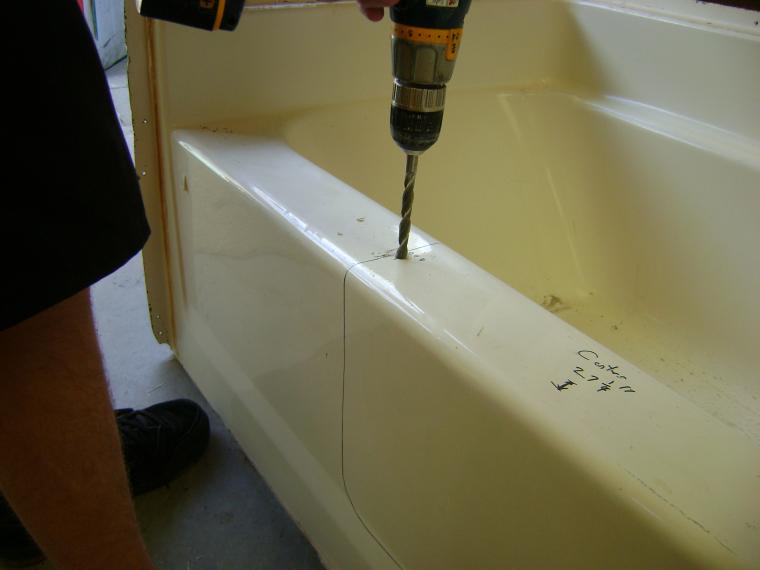
Drill
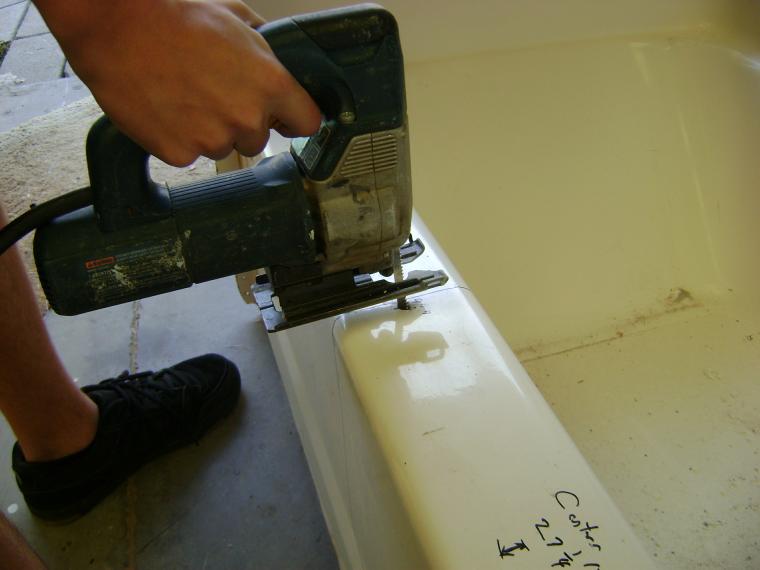
Saber Saw or Grinder, or Saws All or Cut off Saw - (Fine tooth blade for saber saw) Know your tools and your Tub material before deciding.
Waterproof Silicone Adhesive - we recommend using and Aquarium silicone.
Calking - Calking Gun.
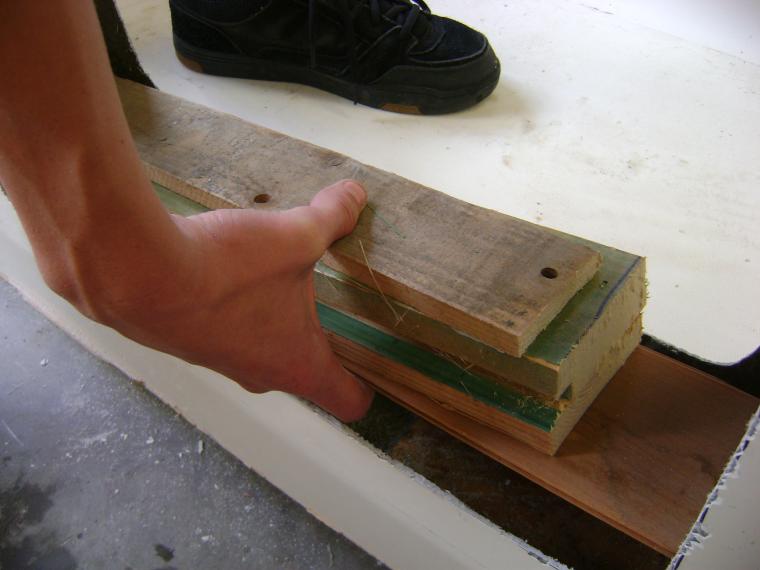
2x4 wood pieces - (for support)
Masking tape (if bathtub is metal with porcelain overlay)
Dust mask
Plastic and tape to mask off remainder of bathroom for dust (if wanted)
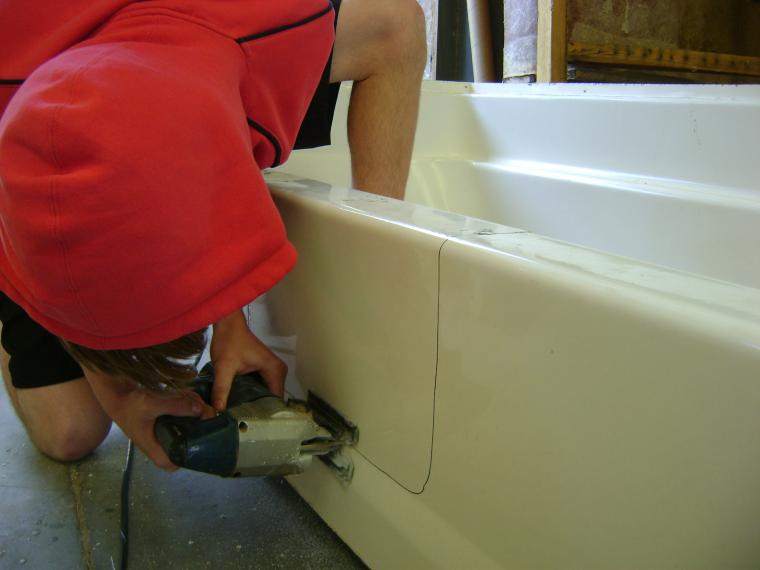
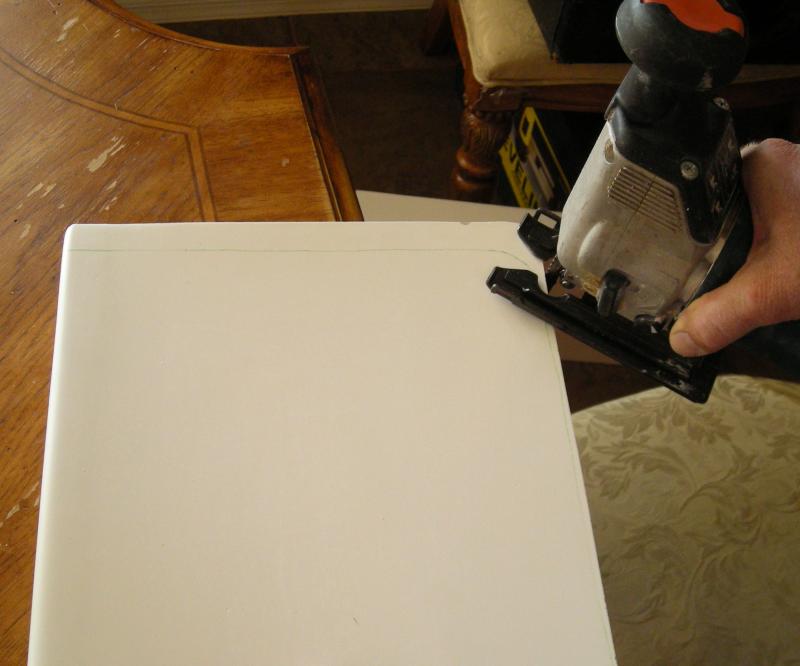
STEP 1
STEP 2
STEP 3
NOTE: IF BATHTUB IS METAL WITH PORCELAIN OVERLAY, USE MASKING TAPE ALONE EDGE OF WHERE YOU NEED TO CUT TO MINIMIZE CHIPPING OF THE PORCELAIN.
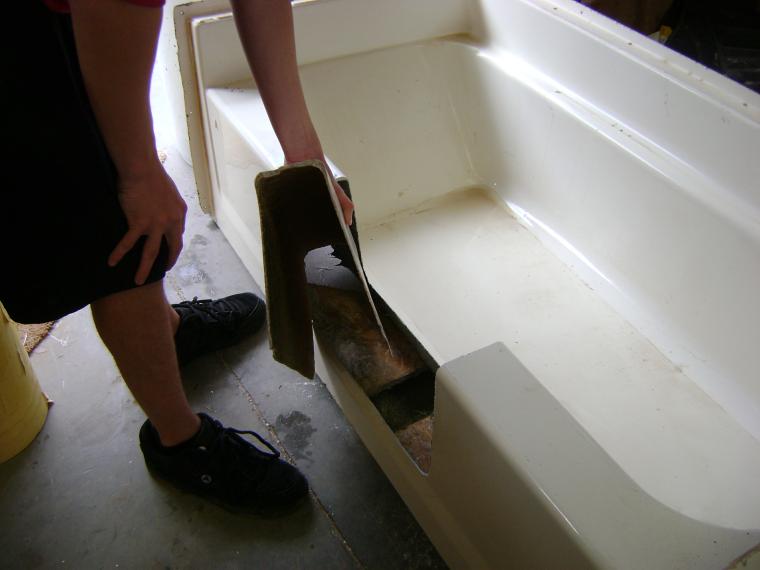
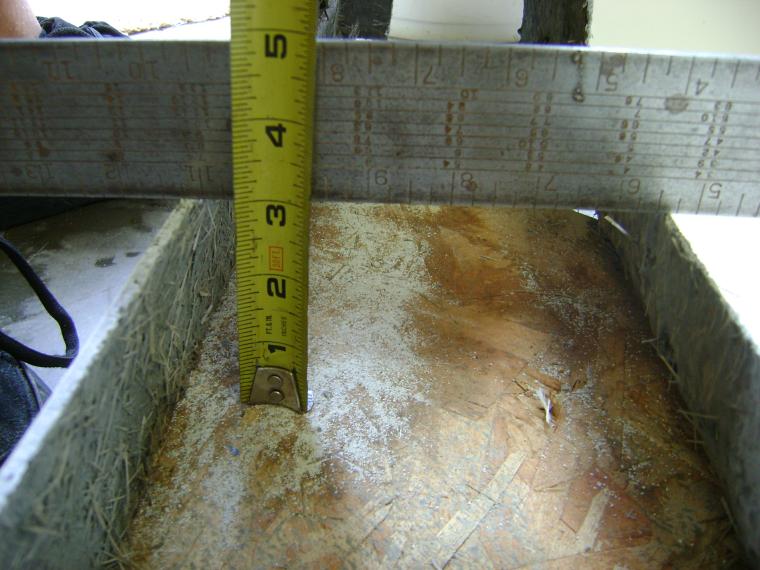
STEP 4
STEP 5
STEP 6
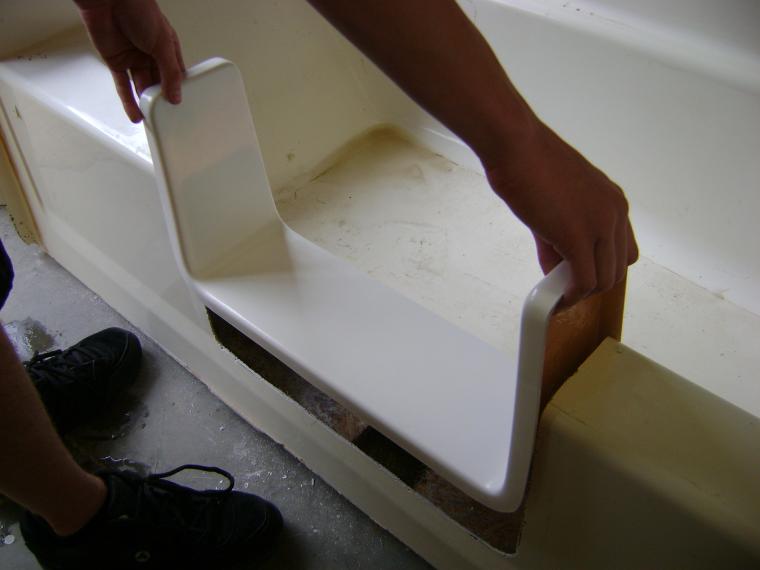
STEP 7
STEP 8

CLICK ON PICTURES TO ENLARGE. PICTURES ARE IN ORDER OF INSTRUCTIONS.
Installing Bathtub Saddle Pictures on Left. Installing Bathtub Reversal Part Pictures on Right below their individual instructions.


INCLUDED WITH REVERSAL KIT:
Bathtub Reversal part
3 Pre-Drilled Rails *** See Caution Below
14 Pop rivets
Tools you will need:
Rubbing Alcohol - Marking pencil - Combination square - Pop rivet gun - Saber saw
Fine tooth blade for saber saw - Drill - 1/8” drill bit - High quality waterproof silicone tube Calking - Calking gun
*** - Caution Pre-Drilled Rails have Sharp edges. May cause Cuts, Wear Leather Gloves when handling.
Step 1
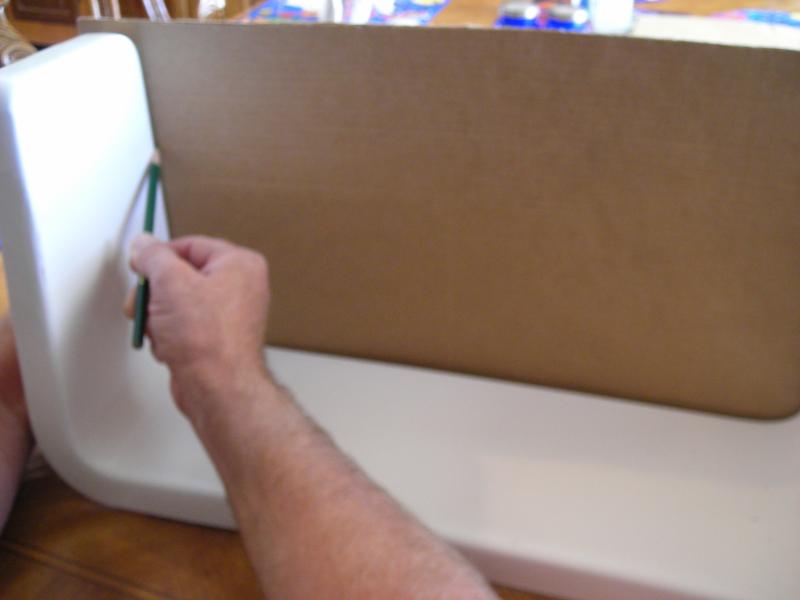
Make a Cardboard template. Hold a piece of cardboard on the inside of the tub and draw outline of insert on the cardboard. Mark the cardboard, with Top, Bottom, Left, Right, Inside, Outside. This will be important later on. Cut the cardboard piece along the line drawn.
Step 2
Set Cardboard Template on the Reversal Piece. Draw a Line on the Reversal Piece. Be sure to flip mark the piece on the top and reverse side. This is where the Top/bottom, etc. comes in handy.
Step 3
Use a short fine tooth blade on a saber saw and cut out the reversal piece on the markings you made in step 2.
Step 4
After Cutting out the Bathtub Reversal Piece, do a test fit.
Step 5
Installing the Rails. While test fitting the reversal piece inside the saddle, draw a line (with pencil ) along one side of the saddle along side and bottom to mark where the reversal is to fit. (holding pencil along the side of the reversal) NO PICTURE FOR THIS STEP.
Step 6
Line up rail with the pencil line. Using a 1/8” Drill Bit hold the rail and drill thru the 6 predrilled holes on the bottom rail and the 4 predrilled holes on each of the side rails into the bathtub insert. You will need to be very accurate with these holes so that they line up later. Take caution when handling Rails as they can be sharp and cause injury.
Step 7
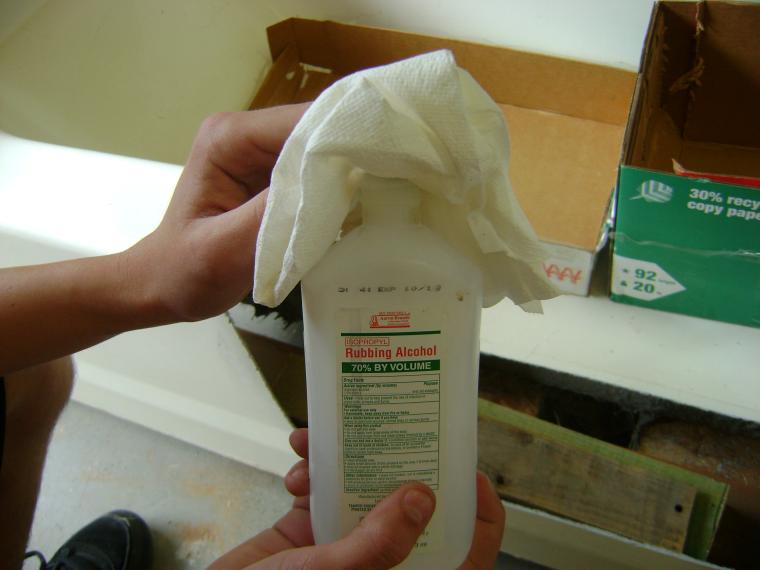
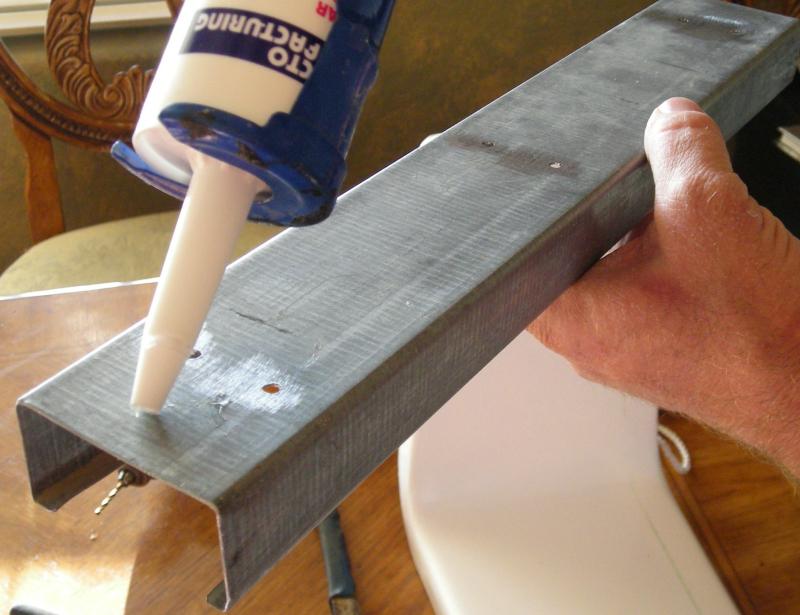
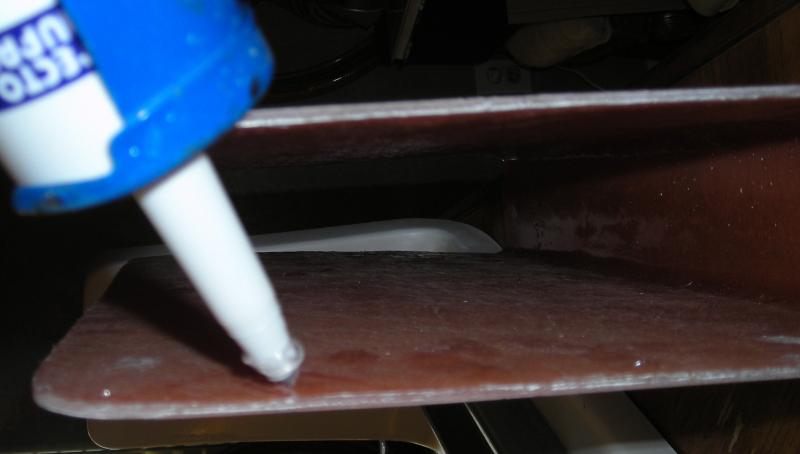
Before using any silicone clean all surfaces that will come in contact with the silicone with rubbing alcohol, this will prevent leakage of the silicone and help the parts to adhere better.
After drilling the holes, apply a few lines of high quality silicone along the bottom of the galvanized rails. While the silicone is wet, line the rails up with the holes you drilled on the insert.
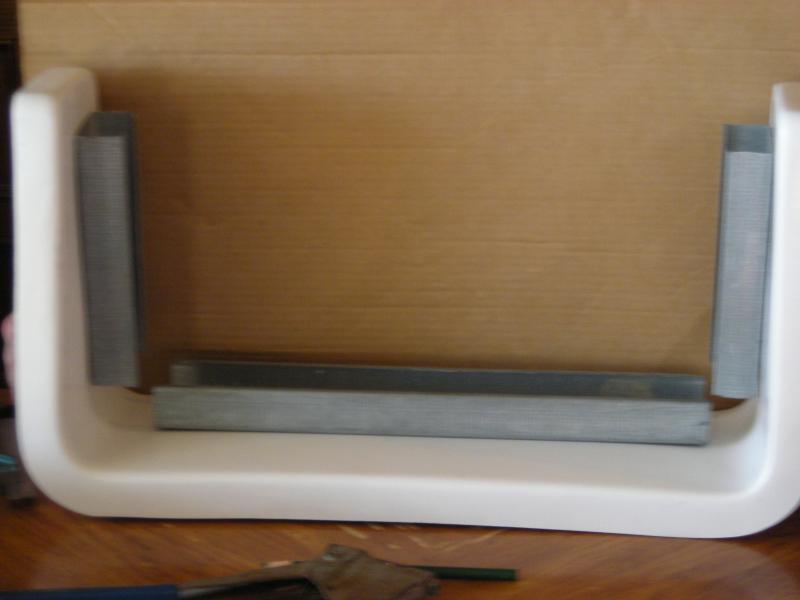
Step 8
After lining up the rails pop rivet the rails in place. All rails should be even with the lines you drew earlier.
Do one final test fit of the reversal piece over the rails before continuing on to step 9.
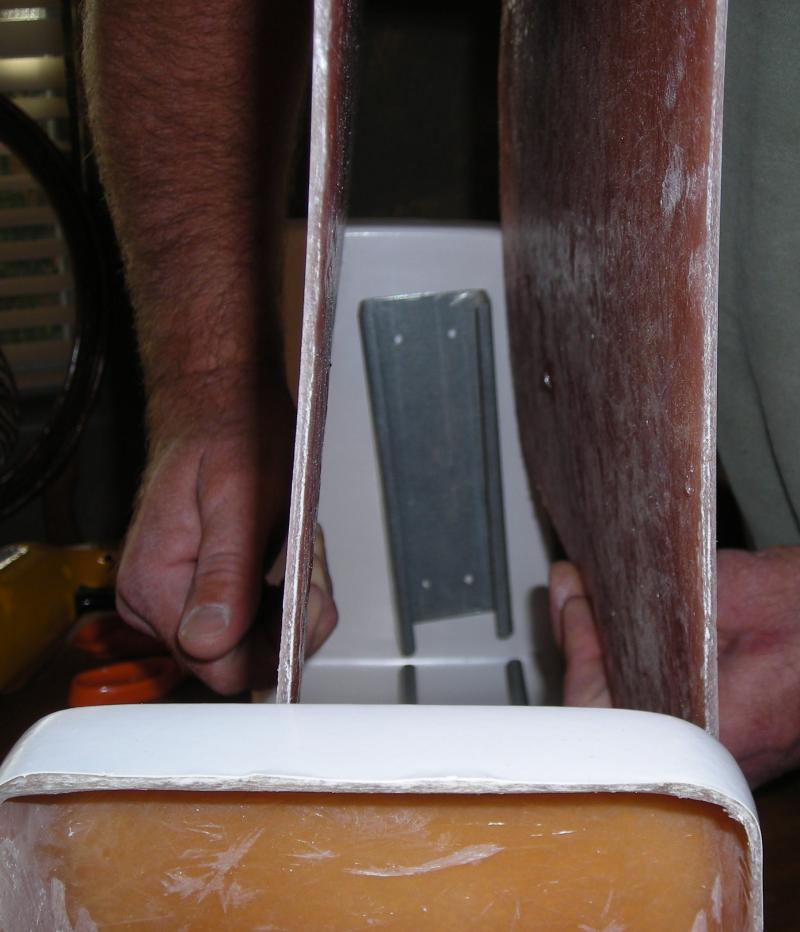
Step 9
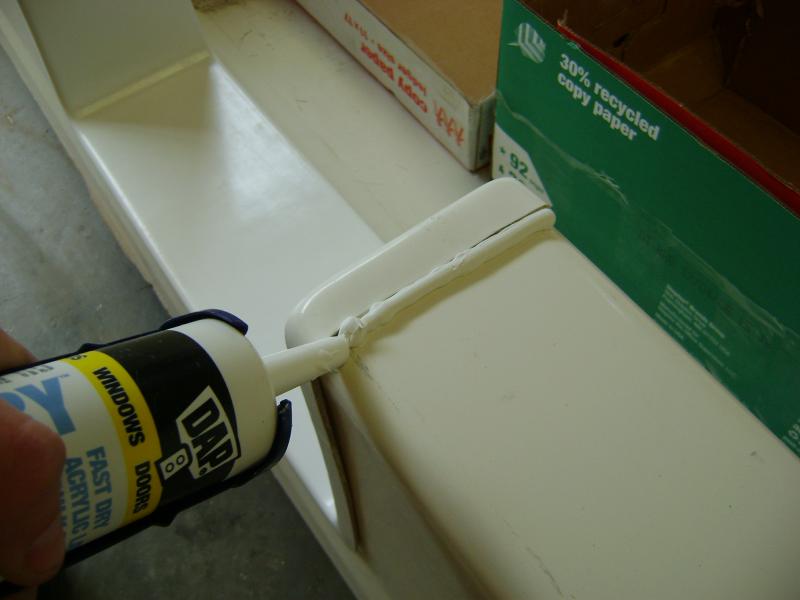
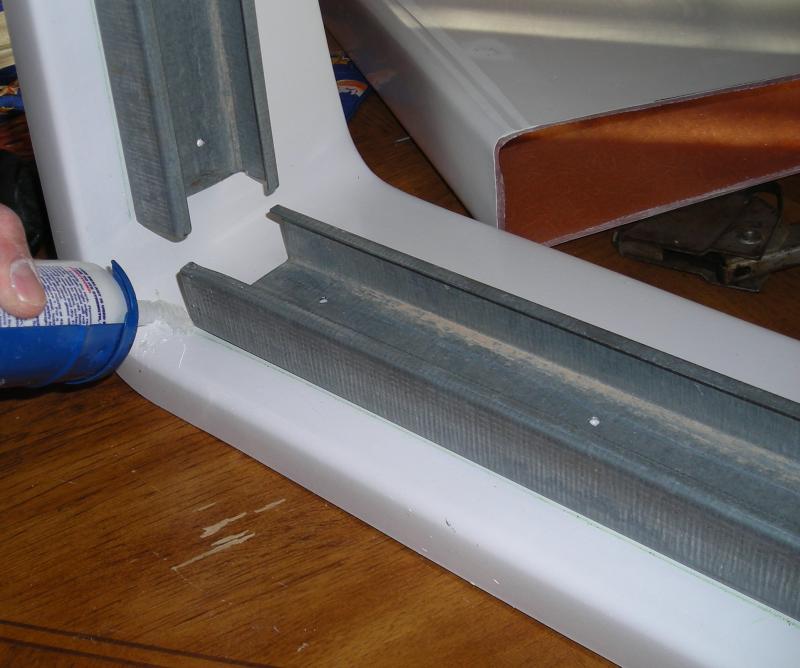
Now that the railing is in place, Install a good quantity of Silicone where the rail meets the insert, along the rail and between the rails along the line previously drawn.
Step 10
Install a line of silicone on the inside edges of the reversal piece.
Step 11
Take the reversal piece and spread apart so that you can slide it over the rails.
Step 12
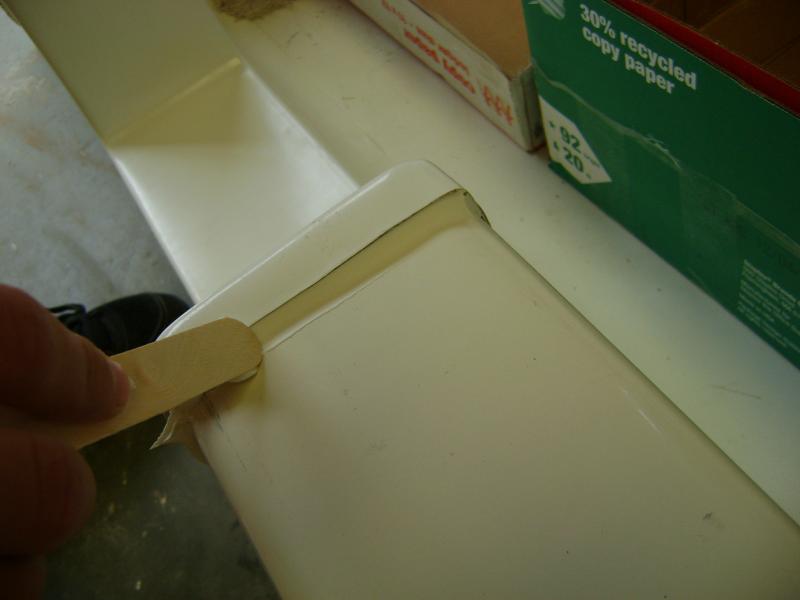
Let the piece sit for 24 hours for silicone to completely dry. After dry then apply calking on outside of both sides of reversal part for a finished look.
INSTRUCTIONS FOR INSTALLING
BATHTUB REVERSAL PART


Safety First:
This is a Do-It-Yourself Project.
Know your tools before you start this or any project.
Be sure to use eye protection.
Take your time and be Safe!!!!
Metal tubs are more difficult than fiberglass tubs to cut, Use a drill to determine the thickness of tub before cutting, then decide which tool to use to cut into the tub. The thicker the metal, the longer it will take to cut out. We can not be responsible for using the wrong tools, or for making an incorrect cut. We Provide the part and basic instructions for installation only. We warranty our part only. If unsure of how to cut the tub or how to use your tools be sure to contact someone locally that can help you with that.